Showing posts with label grill. Show all posts

Monday, August 11, 2014

Orange-Honey Grilled Pork Chops

Hubs and I have been on a chicken kick lately and I just couldn't do it one more night. Once again, I walked in the grocery with nothing on my mind except that we weren't eating chicken!! I decided to turn to pork chops for our Sunday Supper. Bone-in pork chops are great to throw on the girl, and the bone gives the meat excellent flavor.

I created a quick and easy orange-honey marinade with the assistance of Hubs. I absolutely love the flavor of oranges with pork. I just feel like they go perfectly together to create sophisticated flavors in such an easy way. 

What is better than grilling on a gorgeous, yet HOT, Sunday night? Hubs and I love to spend the evenings outside on our back porch. I usually sit and relax while he mans the grill. (he doesn't let me touch the grill). This is my "secret garden." I love to sit out here in the afternoons and listen to the sound of my fountain.


Okay, so what do you say we cook?

Printable Recipe Here! 

Orange-Honey Grilled Pork Chops
naturally GF/DF

Ingredients:

2 bone-in center cur pork chops
3/4 cup orange juice
1/4 cup gf soy sauce
2 1/2 T honey
about 10 leaves fresh basil

What to do:

First thing we have to do is get our marinade ready. We decided to chiffonade the basil. Don't freak out yet, it is a fancy name for a super simple way of cutting your herbs. Simply stack the basil leaves on top of each other.

Roll the basil leaves up lengthwise.

Using a sharp knife, slice the basil, creating small slices of your fresh herbs. 


In a medium baking dish, add the orange juice, soy sauce and honey. Stir together to combine.

Add your pork chops to the marinade, turning over a few times to coat. 


Sprinkle your basil on top of the pork chops and allow to marinate for about 30 minutes. 

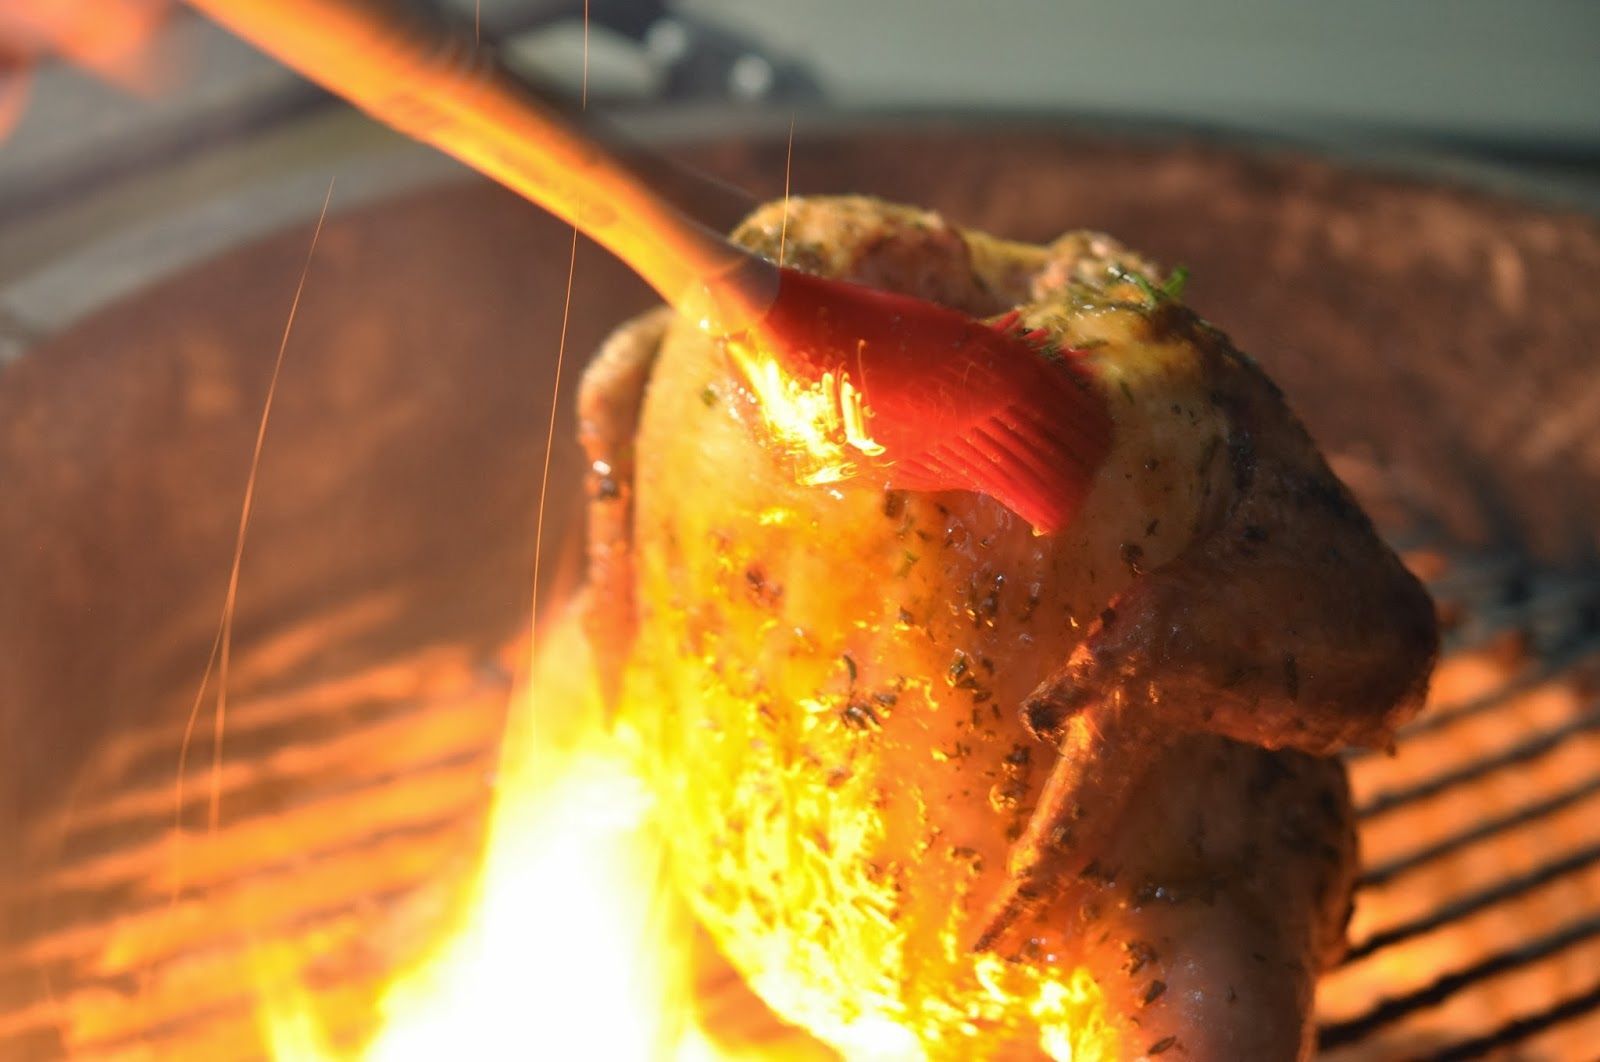
Preheat your grill to about 400-450°. Grill the pork chops for 4 minutes per side, flipping once. Be sure not to over cook! Pork chops can get tough if you overcook. 


When I flip the pork chops, I like to add a little extra marinade for more flavor.


Thanks Y'all!
-Wise Wife


Thursday, May 8, 2014

Grilled Cobia

First off, I am so sorry my posts were slim this week. Our internet was on the fritz! We are back up and running with even higher speeds.

I love throwing some fish on the grill for a light supper. It doesn't really matter what type of fish it is. I love salmon, grouper, snapper, and now I realize I love cobia! If you are in Montgomery, you MUST buy your fish from Destin Seafood Connection!!  They always have the freshest fish and seafood knowledge that you can always trust! They even make fresh to order poboys. However, I would suggest calling ahead. This is the only place I will buy seafood!

When I was at the fish market I was about to ask for the grouper as I often do. The market owner overheard me and mentioned that he had just cut the cobia. I honestly have never had cobia and wasn't sure what type of fish it was. When I told him my favorite fish was amberjack he convinced me I would love cobia even more. He even explained to me how the fish are caught! It is a meatier fish that holds together well on the grill. That is all he had to say! I was sold.

He went even farther, and offered up a recipe for tossing the fish on the grill. He suggested to marinate the fish in italian dressing for "a little while" in the fridge. Then, just sprinkle a little Cavender's Greek Seasoning on the fish and grill between 300-400 until it is done. So I grabbed my fish and headed home to create a recipe from what he suggested. I stopped at the grocery and grabbed my favorite Italian that is GF and contains no high fructose corn syrup and headed home.

 If you want, just grab the seasoning he suggested, but I created my own greek seasoning due to the high sodium content that is usually present in pre-mixed spices.


Happy Grilling! Printable Recipe Here!!

Grilled Cobia
Naturally GF/DF

Ingredients:

2 cobia filet
2/3 cup prepared Italian dressing
1/2 t oregano
1/2 t thyme
1/4 t basil
1/4 t marjoram 
1/8 t garlic powder
1/8 t onion powder
 pinch of salt
1 1/2 T olive oil

What to do:

First we need to get the fish marinated in that Italian Dressing. Add your fish to a small baking dish (or ziplock bag if you don't want to dirty up another dish).

Pour the Italian dressing over the top of the fish.

Cover with plastic wrap. Place in the fridge for at least 30 minutes. I let it marinate for about an hour.

While your fish is marinating, add the remaining ingredients together into a small bowl.

Mix the spices all together. Voila, you have just made your own greek seasoning!

Remove you fish about 15 minutes before you grill so it isn't super cold. Sprinkle the greek seasoning over both sides of your fish. I like to reserve a little of the spices to use after the fish comes off the grill. Somehow I forgot to take this pic. SO SORRY!!

Grill your fish at 350° for about 10 minutes, flipping once.


Once the fish turns white, it is ready to remove from the grill. As I mentioned before, sprinkle the remaining greek seasoning over the top of the fish.

Enjoy!

Thanks Y'all!
-Wise Wife 

Tuesday, March 11, 2014

Beer Can Chicken

This weekend our house was pretty lazy. We have so much coming up the next few weeks, we wanted to take a weekend to just sit around and enjoy each others company. All the things we have coming up are going to be so much and we are so looking forward to them, but it is still nice to have a laid back weekend. Sunday rolled around and after Church I just wanted to relax a little longer, so Hubs took over the kitchen. It was the weekend of the time change so we had lots of extra light in the day which is SO wonderful around our house. We decided to slow cook something on the grill. I love when the Hubs volunteers to grill for me. It is always delicious and healthy.

If you have never had a beer can chicken, you are missing out!! It is super simple and has so much flavor. If you are worried about the alcohol in the beer, I promise it cooks out. You are just using the beer for the flavors. You can use always use non alcoholic beer. If you are worried about the gluten from the beer, you could also use gluten free beer. I don't know if this recipe can be considered gluten free, but I know its delicious :)

Beer Can Chicken
DF

Ingredients:

1 whole bone in chicken
1/4 cup plus 3 T olive oil, divided
1 tsp salt
1/4 t sage
1/4 t parsley
1/4 t garlic powder
1/8 t paprika
5 sprigs fresh rosemary, divided
12 sprigs fresh thyme, divided 
1 can of beer
2 T lemon juice

What to do:

Heat your grill to 375°.

Wash and pat dry the chicken.


Add your chicken to a small baking dish.

Using your hands, smooth 3 T olive oil all over your chicken. This is what gives the chicken that nice golden color.


In a small bowl, mix together your salt, sage, parsley, garlic powder, and paprika.

Chop 2 sprigs of fresh rosemary and 4 sprigs of fresh thyme.

Spread half of the salt mixture over the chicken. Reserving the rest for later in our cooking process. Again using your hands, spread your chopped herbs evenly over the chicken.

This process must be done VERY carefully so you don't cut yourself. Open up the beer and dump 2 tablespoons out of the beer. With a paper towel, press the opening of the beer down to increase the opening.


Add in 2 sprigs fresh rosemary and 4 sprigs fresh thyme. The beer may foam up and that is fine. Just let the foam dissipate on its own. 

Once the foam is gone, add the lemon juice into the beer can. 

Carefully carry the beer and chicken to your grill. Don't try to do this next step inside and carry outside to the grill because you will spill the beer everywhere….I may or may not have done this before :)

Once by your grill, stick the the beer inside the cavity of the chicken.

Place the beer can directly onto the grill and adjust the legs to make sure the chicken stays standing.


While your chicken starts to cook, grab your salt mixture you set aside. Add 1 sprig of chopped rosemary and 4 sprigs chopped thyme.

Pour in 1/4 cup olive oil into your salt mixture. Using a basting brush, carefully stir your herb mixture. You will use this mixture to baste the chicken throughout the cooking process.


Allow the chicken to cook for about an hour. Approximately every 15 minutes, baste the chicken with the olive oil herb mixture. This step is very important as the skin of the chicken can become to try and burn if you do not baste with the olive oil. Be very careful during this step as the olive oil will make the fire flame up. (Yes the Hubs has lost some arm hair during this step before) My advice is to use a basting brush with a long handle.


Once cooked thoroughly, carefully remove from the grill and cut the meat off the bone and enjoy!


Thanks Y'all
-Wise Wife